Tools for Degree Audit
Resources:
General Education Course Listing (Excel) (effective Fall 2026)
Core Curriculum Worksheet
Degree Progress Report
The Degree Progress Report (DPR) is an online self-service tool for matriculated undergraduates. It is designed to help students and advisors plan course selection each semester and keep track of the fulfillment of degree requirements.
The DPR evaluates the student’s transcript against their graduation requirements as outlined in the Undergraduate Catalog. It uses courses taken, as well as those in progress, to assess fulfillment of General Education, College, Major and Minor requirements and identifies outstanding requirements.
The report is interactive, changing as courses are added and dropped. Active links within the report provide additional details. When the “View Course List” link is shown under a requirement section, a list of courses is provided that will fulfill that specific requirement. Current class offerings of the course can then be viewed by selecting the link for course catalog description in the given course list.
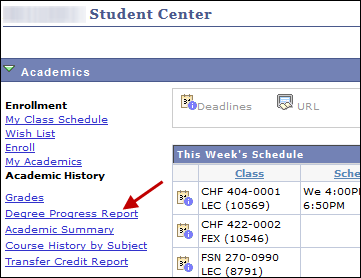
Degree Progress Reports are available in MaineStreet. Students access the report by navigating to Main Menu > Self Service > Student Center > “Academics” section. Advisors may access the report using their Advisor Center “Student Details” list, or the “View Student Center” link. The report is generated by selecting the “Degree Progress Report” link.
Questions regarding the Degree Progress Report can be sent to um.degreeaudit@maine.edu
What-If Report
The What-If Academic Advisement Report is similar to the Degree Progress Report, but it incorporates user-selected scenarios to generate an unofficial report to show degree progress if a student were to change a major, minor, concentration, catalog year, etc.
Below are instructions on how advisors can access the What-If report. Note: This report can be run when the Degree Progress Report is otherwise unavailable for inactive/suspended students.
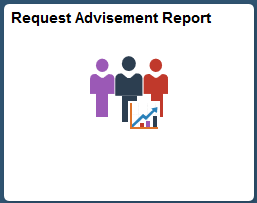
- In Campus Solutions, from the Academic Homepage, locate the Request Advisement Report tile.
- Select the “Add a New Value” tab. Enter the student’s ID. Enter “UGWIF” for the Report Type. Click Add.
- Academic Institution should pre-populate with UMS05, the institution code for University of Maine.
- Check the box labeled “Use Career Simulation” and click “View/Change the Career Simulation”.
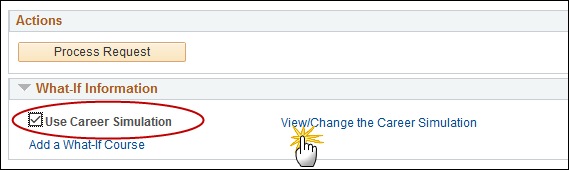
- Note: Using the “Add a What-If Course” option is not recommended.
- Choose one of the two following actions:
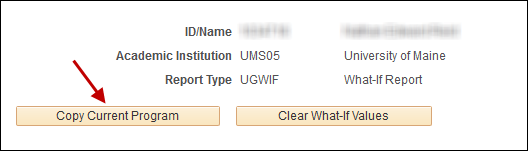
- Select the “Copy Current Program” button to populate the fields with current academic program/plan/sub-plan information.
OR - Manually enter the values to be included in the scenario.
- Select the “Copy Current Program” button to populate the fields with current academic program/plan/sub-plan information.
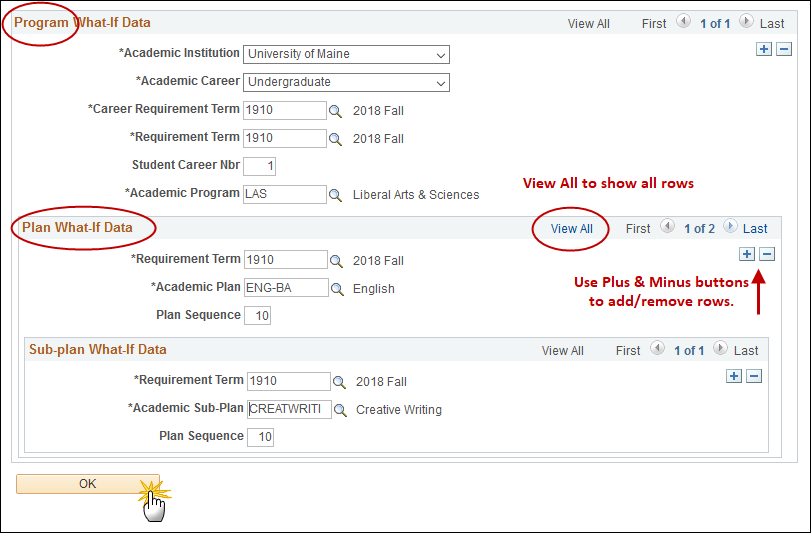
- Once the desired options for the What-If scenario are entered (see below), select the “OK” button at the bottom of the page and return to the Report Request page.
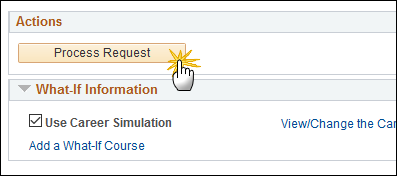
- Select the “Process Request” button.
The generated report results will be based on the scenario options provided.
Options for setting up the What-If scenario:
- Select different academic program, adding/removing academic plans (majors/minors), adding/removing sub-plans (concentrations).
- If the current program was copied, check the “Plan What-If Data” section for multiple rows indicating the student has more than one academic plan. Use the “View All” link to see all plan data. Remove rows with the plans not being used for the What-If Report by selecting the corresponding minus button.
- Select a different requirement term to use a different catalog year’s requirements.
Degree Planner
Degree Planner is a visual, interactive tool in the Student Center. With it, you can:
- See exactly what classes and requirements your advisees need to graduate
- Track their progress each semester
- Plan future schedules and explore “what-if” majors or minors
- Get timely alerts about prerequisites and course order
You and your advisees can use Degree Planner together to map out your journey and keep them on track for success.
Important to Note
Although the Planner Report uses the same degree requirements as the Degree Progress Report, the Planner Report is not a substitute for the Degree Progress Report.
How do I access Degree Planner for a student I am working with?
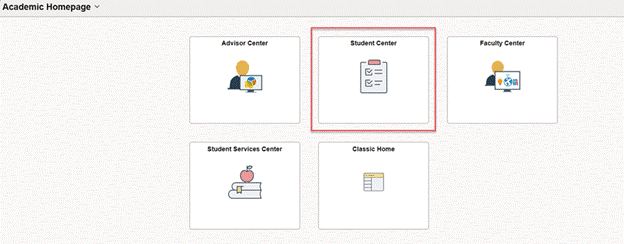
- From your Academic Homepage in MaineStreet select the Student Center tile.
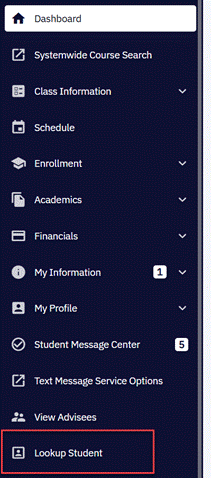
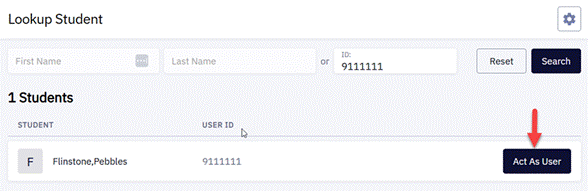
- Choose to “Look Up” a student from the left-hand navigation.
- Enter the ID or student name and select Search to search.

- Select Act As User and agree to the FERPA statement.
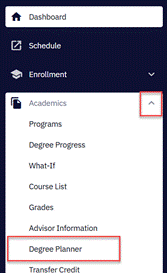
- You are now viewing the Student Center as the student. Use the left-hand navigation to select Academics, then Degree Planner.
- A splash screen will appear that will let you view tips.
- You now have the same access as the student does. Please read the student section for more information. You can adjust student paths and create new paths for students. Paths created by the advisor can be locked if you prefer that a student not delete or modify the path.
Degree Planner helpful resources
The Planner
The Planner is a tool available in MaineStreet Student Center that helps with planning for enrollment in future classes. The Planner is built by the student and consists of a list of the courses that will be taken during their academic career toward earning their degree. The courses can be organized by term so when enrollment time arrives, the Planner can be used to find sections of courses included in the Planner that are offered for the term and then add them to the Wish List.
Once a student builds their Planner, advisors can view the courses that have been selected. A student’s Planner can be accessed via the Advisor Center or the Student Center. In addition, a version of the Degree Progress Report may be generated by the advisor which would include the courses the student has placed in their Planner.
Important to Note
Although the Planner Report uses the same degree requirements as the Degree Progress Report, the Planner is not a substitute for the Degree Progress Report. It is intended for planning purposes only to simplify the process of enrolling for classes. Best practice is to remove courses from the Planner once enrolled. This will prevent duplication of information on the Planner.
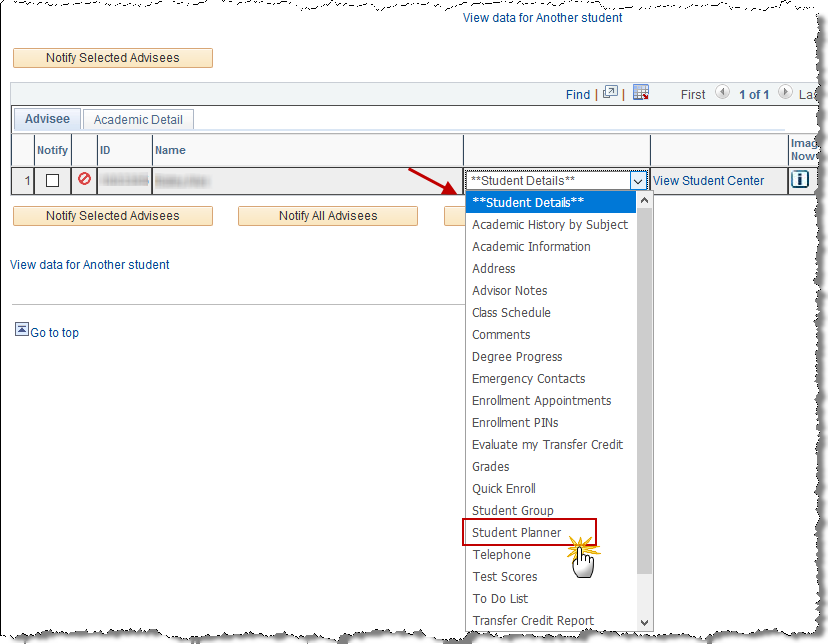
To view the Student Planner from the Advisor Center:
- Navigate to the Advisor Center.
- Open the **Student Details** drop down list next to the student’s name and select “Student Planner”.
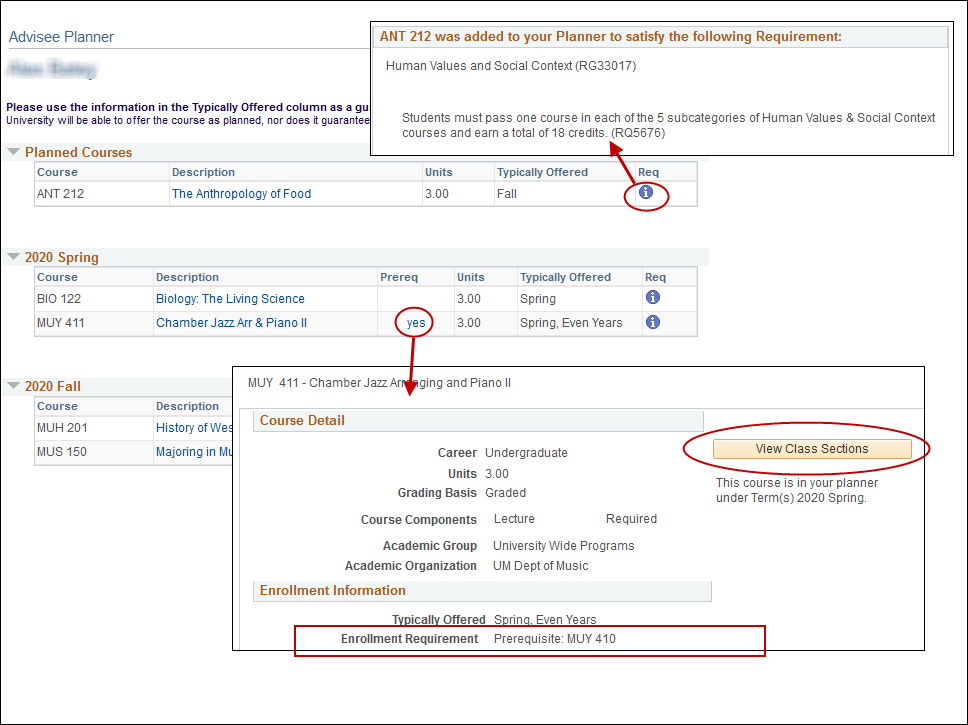
Features of the Planner:
- View the details of the requirement met by taking the course by selecting the information icon.
- If a planned course has a pre-requisite, use the “yes” link to view the course details enable a view of the pre-requisite information.
- Use the “View Class Sections” button to see the sections offered for the term in which the course has been assigned in the Planner.
Generating the Planner version of the Degree Progress Report
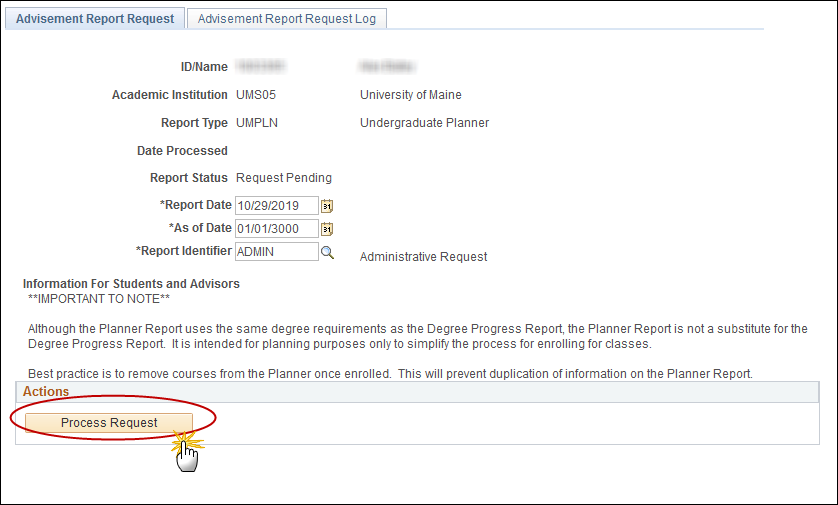
- In Campus Solutions, from the Academic Homepage, locate the Request Advisement Report tile.
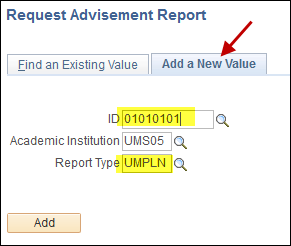
- Select the “Add a New Value” tab. Enter the student’s ID. Enter “UMPLN” for the Report Type. Click Add.
- Academic Institution should pre-populate with UMS05, the institution code for University of Maine.
- Select the “Process Request” button.
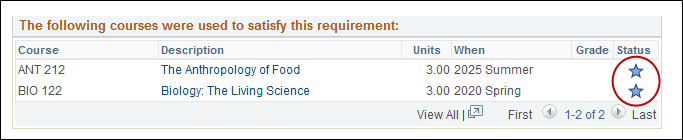
The report generated mirrors the Degree Progress Report, but differs in that the courses that are in the Planner are included. These courses are designated with a star icon.